


Although we were a bit skeptical at first, after receiving the Nexus 6P last week and playing around with it non-stop since then we can conclude, without a shadow of a doubt: the Nexus 6P isn’t just the best Nexus device, it’s arguably the best Android device to come along in years. If you’re a new owner, we probably don’t need to tell you that.
One thing we did want to discuss, whether you just received the Nexus 6P or it’s still coming in the mail, are the first things every owner should do. Although the following guide is more geared to the new or casual Android user (please feel free to share with your non-tech savvy friends/family), we think veterans might find something useful as well. Here are the first 11 things every Nexus 6P owner should do.
1. Use the included power adapter whenever possible
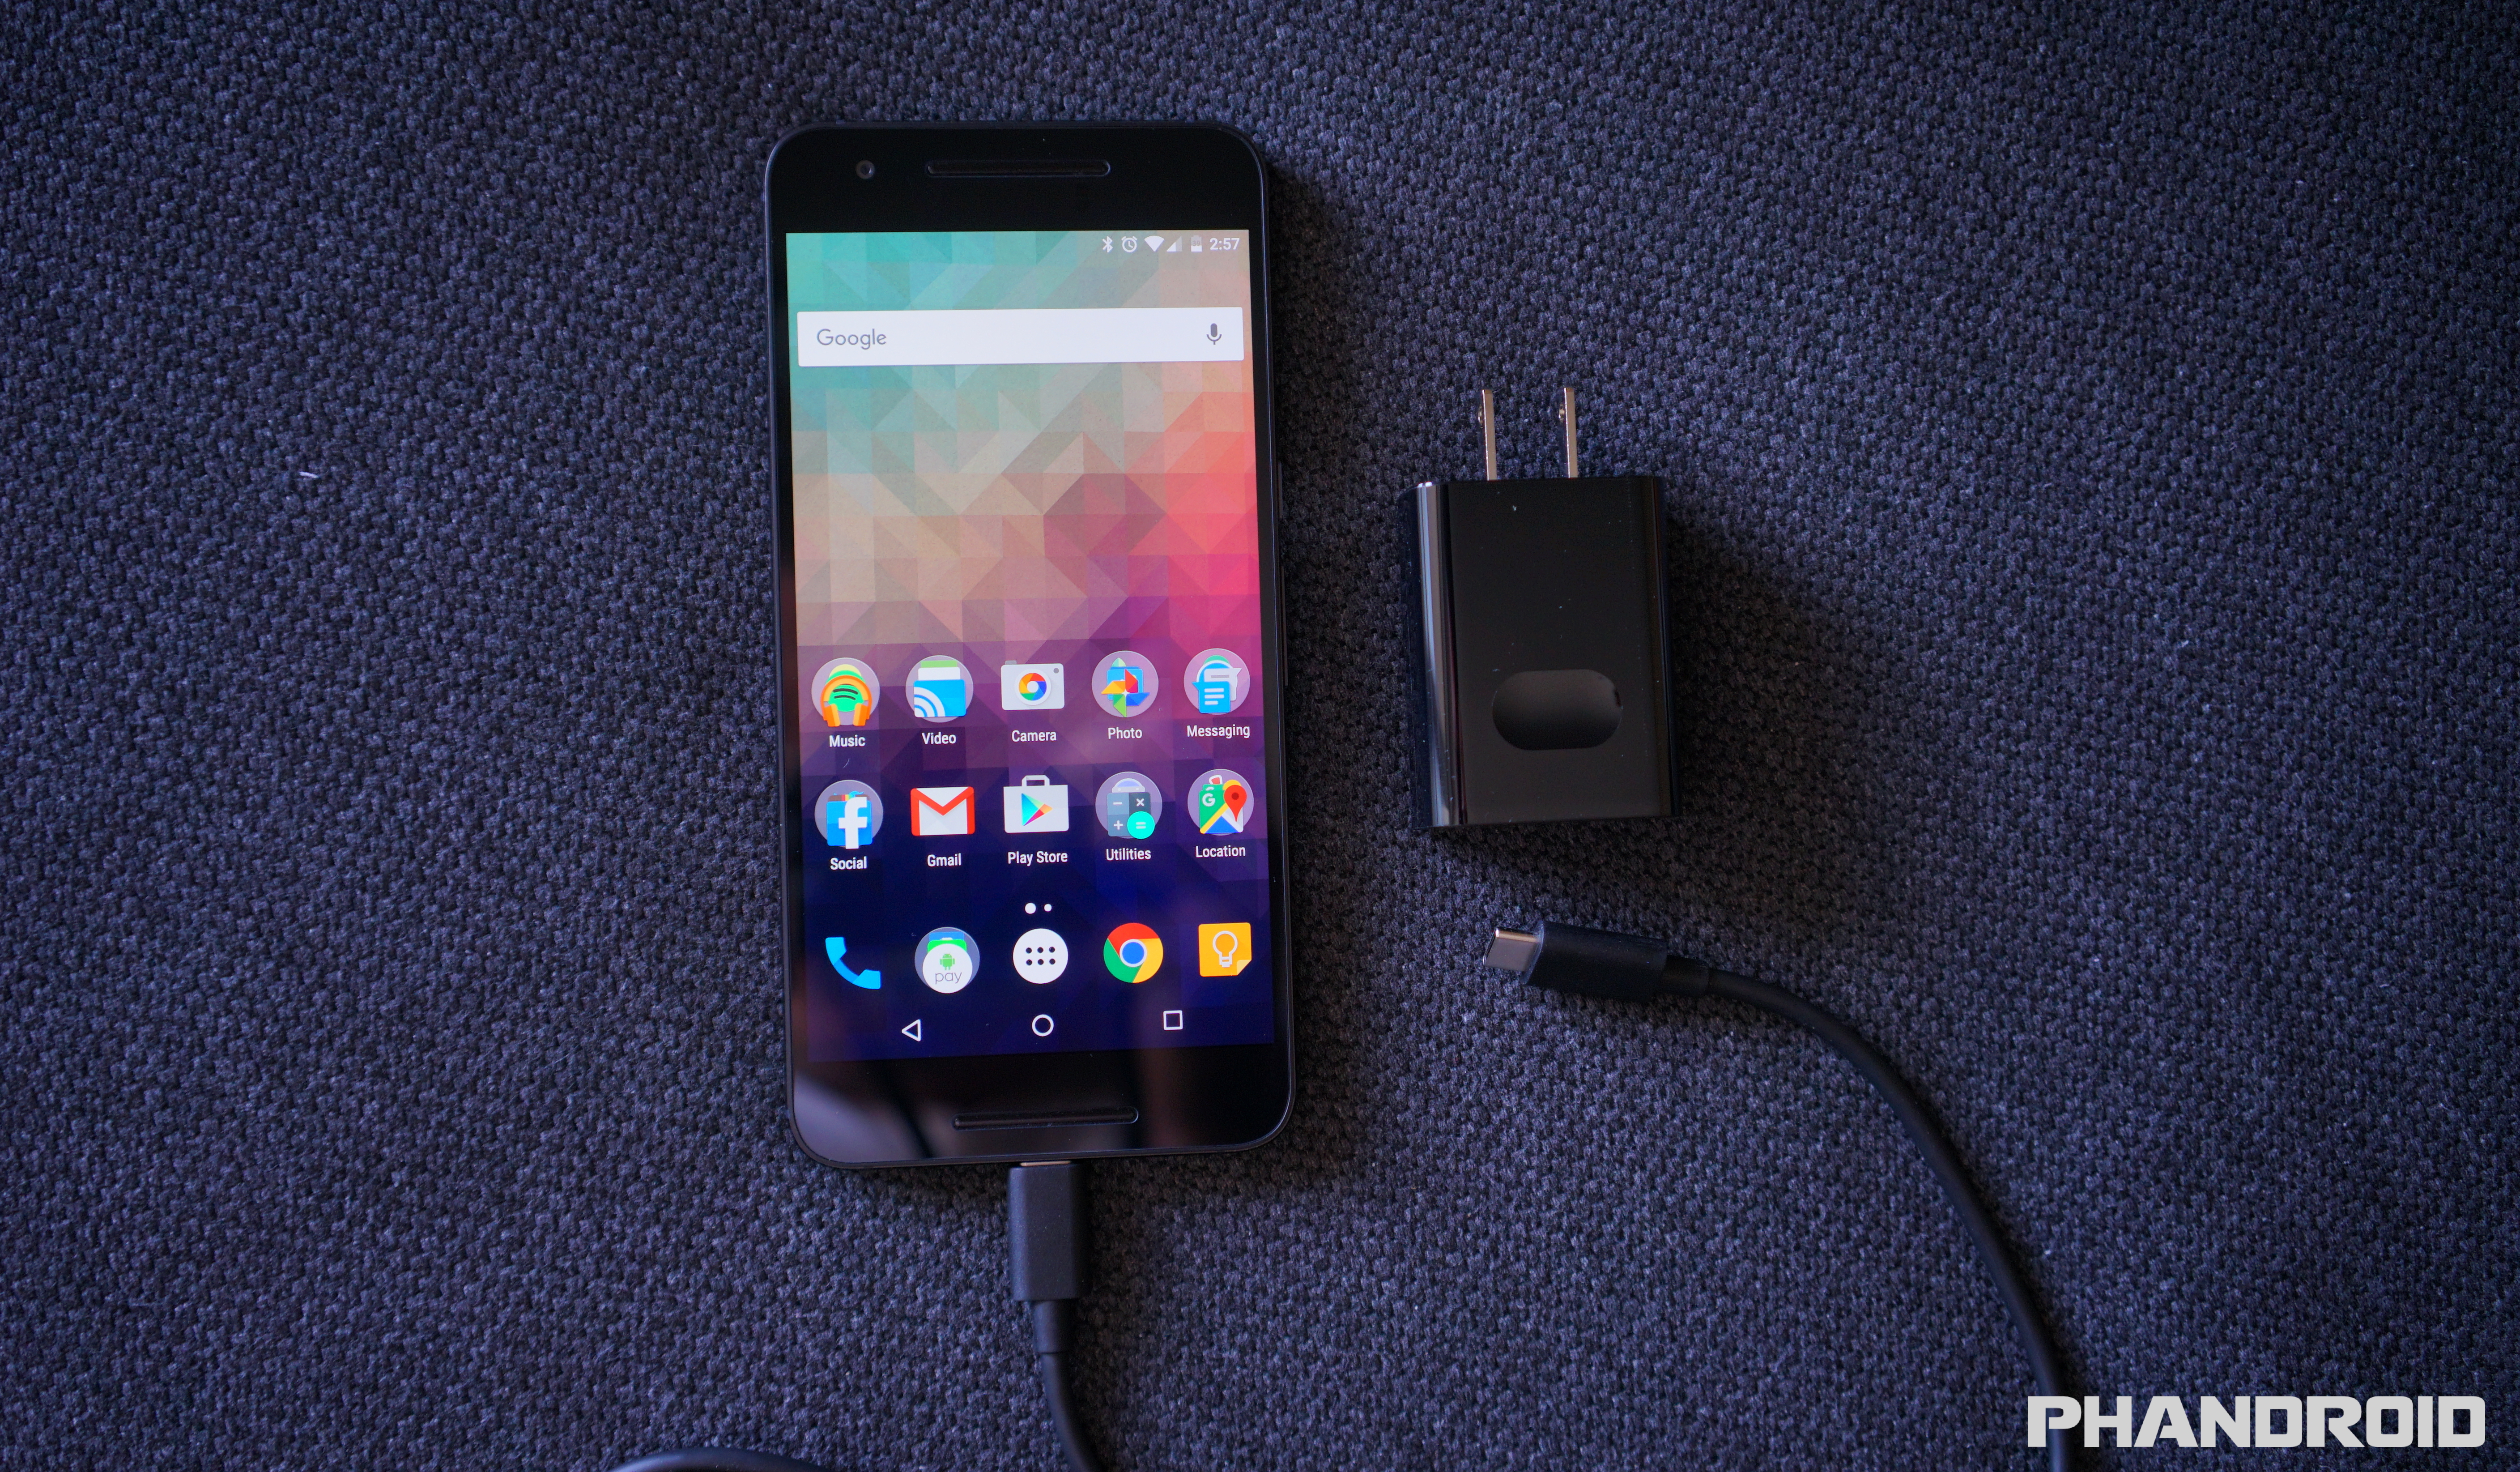
Although the Nexus 6P doesn’t technically support Qualcomm’s “Quick Charge 2.0,” the 6P does have its own fast charging tech. Google says you can get 7 hours of usage out of a 10 minute charge, but there is a catch: you’re going to have to use the included wall charger, not some rink-a-dink wall charger you found at the 99 Cent Store.
Because of the phone requires a very specific type of charge (5V/3A), finding additional 3rd party options can be kind of tough. Should you be looking for a spare, you can always buy an official Nexus 6P charger from the Google Store — in single or dual-port varieties — although at $25 and $40, respectively, they’re a bit pricey.
Of course, you can always experiment with whatever charger you have laying around and the include 6-inch Type-C to Type A cable (good luck), just know that it probably wont charge as quickly even when the the Nexus 6P lock screen shows that it’s “fast charging.”
2. Sign into your Google account and restore select apps/games

Okay, so this one is pretty much a given. To enjoy just all the free and paid apps/games on the Google Play Store, you’ll need to sign into a Google account. There are a few options Google will give you during the initial setup process, one of which is called Tap & Go. All it does is copy your Google account sign-in info from another (NFC equipped) Android device by pressing the back of them together. It’s neat if you have your old device handy, just make sure it has NFC or it wont do anything. Of course you could always manually type in your sign-in info…
Once you’re all signed in, Google will allow you to choose a previous phone you’d like to copy apps from (either all of them, or just specific apps/games). Depending on the amount of apps you’re restoring, it could take a good 10 minutes, so now would be a good time to make a sandwich. Keep in mind, this wont restore everything, but you should have all your Google contacts moved over followed by the mass re-downloading of all your apps from the Google Play Store. We recommend connecting to WiFi for the quickest results.
3. Secure your phone with fingerprints, pattern, PIN, or password

Our smartphones carry a lot of sensitive information inside, information you probably don’t want ending up in the wrong hands. Should you ever find yourself leaving your phone in a cab, restaurant or even a friends/family place, you’re probably going to want to lock it down with a secure lock screen lest you have someone snooping inside.
The great part about Android is there are a few options available to you — pattern, PIN, and password — and no matter which method you choose, it’s always better than nothing. Because the Nexus 6P also has a fingerprint sensor that can unlock the phone (also known as “Nexus Imprint”) chances are you’ll rarely have to use any of the above methods (as they’re only for backup), but you will be forced to pick one.
If you really want extra security and render your phone useless in the hands of a thief or new owner, you can even have your phone require a PIN before it even boots up. You know, to be on the extrasafe side. Then again, if the phone doesn’t boot, you wont be able to locate it if it gets lost or stolen. Just a thought.

You probably already came across the “Protect your phone” process during the initial setup, but in case you skipped over it, here’s how you can quickly secure your phone later:
1.Go to Settings app > Security.
2.Tap on Nexus Imprint.
3.Choose a secure screen lock from the list (pattern, PIN, or password).
4.Decide whether you want enable “Secure startup” (not recommended for most people).
5.Create a pattern/PIN/password.
6.Decide whether to show full notification content on lock screen, only the app it came from, or nothing at all.
7.Add fingerprints using the Nexus Imprint sensor on the back of the phone.
8.Press the sensor 6 times to record fingerprint data.
That’s it! We recommend adding additional fingerprints using the same index finger twice, but in a slightly different position each time for better accuracy when unlocking using Nexus Imprint. For instance, the first time place your finger flat on the sensor for the first fingerprint. Then, add another using the same finger, but this time use the tip or side of your finger to touch the sensor. This way, no matter how you press your finger on the sensor, you’ll get an accurate reading. Google says recorded fingerprints are encrypted and never leave the actual device, so don’t worry about them being uploaded to the cloud somewhere.
4. Use your fingerprint to make purchases on Google Play

Android isn’t nearly as annoying as iOS is when it comes to downloading free apps. Although you wont be asked for your password when downloading free apps and games, you’ll more than likely reach a point where you actually want to buy something. Entering passwords can be annoying, especially if you have potato fingers like mine. Thankfully, in Android 6.0 Marshmallow, you can now make purchases using Nexus Imprint. You can enable it only 3 easy steps:
1.Open the Google Play app.
2.Slide out the navigation drawer and select Settings.
3.Scroll down and check the box for Fingerprint authentication.
Now, the first time you make a purchase on the Play Store it will still ask for your password, but everything after that can be bought using your fingerprint. You can also skip all that and simply select the option to “Use fingerprint for future purchases” when buying something. Keep in mind that however you enable it, you’ll still have to enter your password the first time, but from here on out, it’s all fingerprints.
5. Use Smart Lock to keep phone unlocked when at home or connected to your smartwatch

Even though Nexus Imprint is more convenient than having to enter a pattern/PIN/password every time you unlock your phone, it can still be a nuisance. For instance, when you have the phone laying on a desk and just want to check on something really quick. Or perhaps you just got home from a long day at the office and don’t want to have to bother using your fingerprint every time you need to check in with your city on Clash of Clans.
Because this is Android we’re talking about here, you have other options as well. Like your phone automatically removing the secure lock screen as soon as you walk through the door of your home. You can even set it so that it’s unlocked when it’s on your person, or say, connected to a Bluetooth device like your smartwatch, wireless speaker, or car stereo. Should you leave the phone in a restaurant, you’ll have the piece of mind of knowing that it automatically locked itself. Neat huh? Here’s where you’ll find it: Settings app > Security > Smart Lock (enter password/PIN/pattern). From there you’ll have a few options:
- Trusted devices – keep your phone unlocked when connected to specific devices (speaker, car, smartwatch) via Bluetooth.
- Trusted places – keep your phone unlocked when you arrive in specific places (home, work, etc.).
- Trusted face – phone will automatically unlock when it recognizes your face after turning the screen on.
- Trusted voice – unlock the phone using your voice.
6. Enable developer mode (to speed up animations)

There’s no denying the Nexus 6P is fast. In fact, it’s the fastest Android device we’ve ever laid our hands on. But we can do better. You can actually make the phone feel even zipper by speeding up the transition and UI animations. It’s hidden away inside the Developer options, but here’s how you can find them:
1.Open the Settings app.
2.Scroll down to the bottom and select About phone.
3.Scroll to the bottom and press Build number 7 times (you’ll see a confirmation that you are now a developer), press the back button.
4.Developer options will now appear at the bottom of Settings, select it.
5.Find window animation scale, transition animation scale, animator duration scale and select .5x for each.
7. Enable System UI tuner to add battery percentage
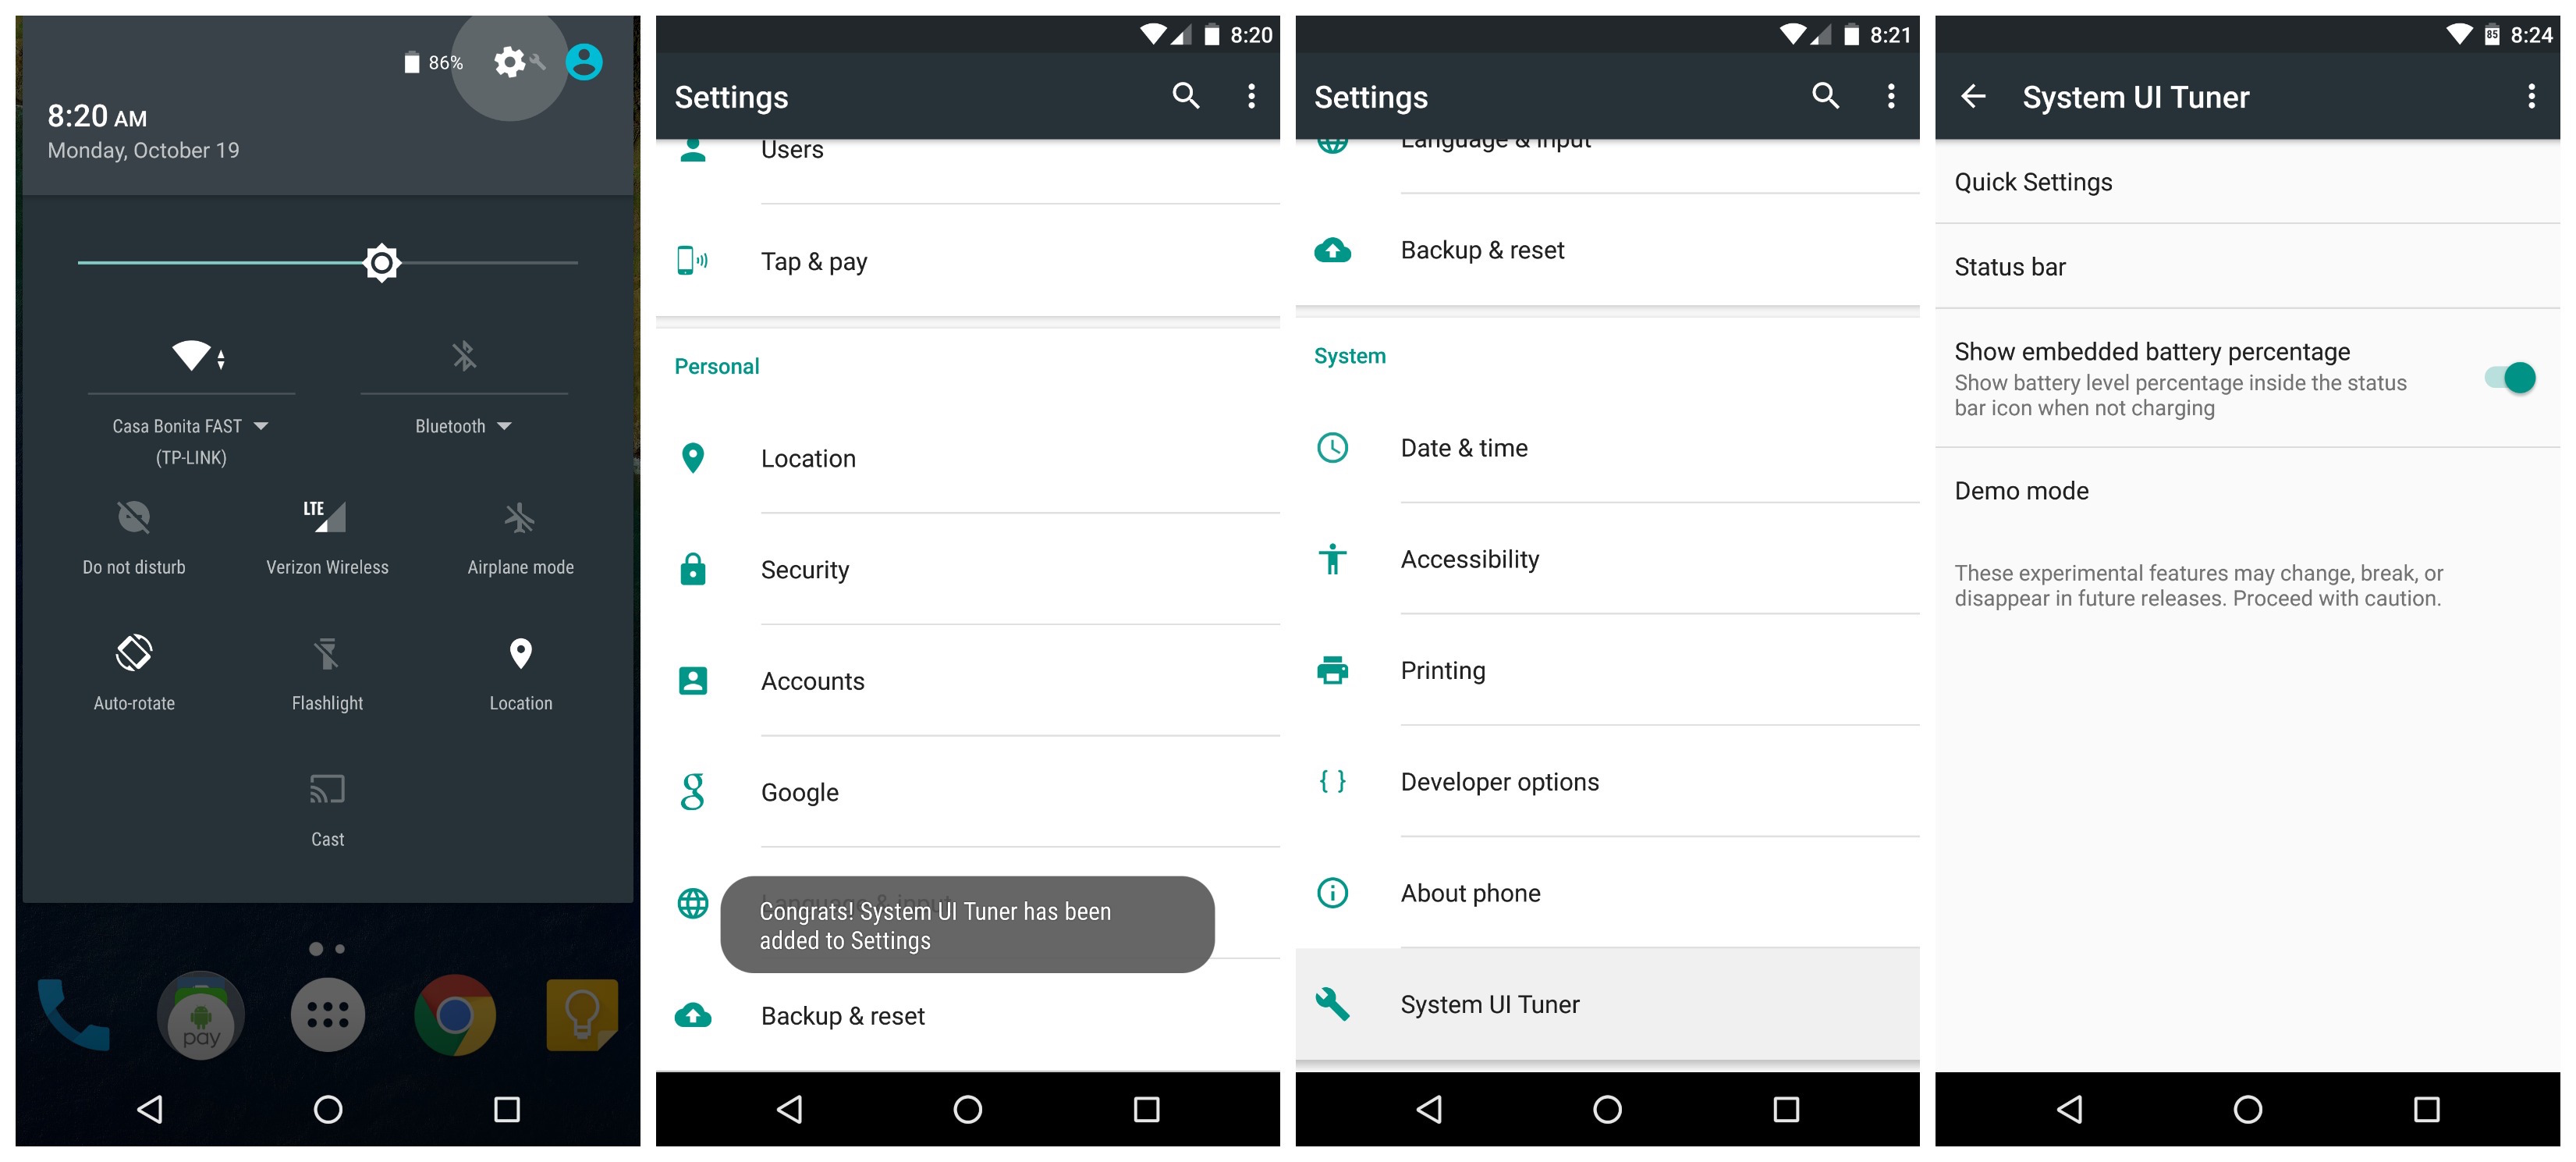
By now you’ve probably noticed how the battery icon in the status bar doesn’t display the actual battery percentage. If you’re looking for a little more detail, tucked away in Android 6.0 Marshmallow is another hidden setting called System UI Tuner. Why it’s hidden, nobody knows, but Google says it’s still “experimental.” Don’t worry, we’re not going to use it for much.
Just pull down the notification tray twice and long press on the little Settings gear icon for about 5+ seconds. It make take more than 1 attempt, but once you let go and pull the shade back up, you should see a new prompt telling you that “Congrats! System UI Tuner has been added to Settings.” Just like those Developer options, you’re going to scroll down to the bottom of the Settings app where you’ll find a new setting called System UI Tuner.
Once inside, Google will warn you about the features being experimental, just select “Got it” and “Show embedded battery percentage. After that, the battery icon in your status bar will show you a battery percentage. Easy peasy.
8. Enable Google Fit
Google Fit is pretty great for tracking general physical activity throughout the day. It’s not as incredibly in-depth as some other services, but the fact that it comes pre-installed on most Android devices and syncs your data to your Google account, you’ll probably want to use it. The only thing you need to do is open the app and enable it.
1.Open the Google Fit app.
2.Sign in with your Google account.
3.Fill out your height, weight, gender, and set a personal fitness goal.
Because the app runs in the background, you wont have to worry about opening it every day or messing around with it too much. Just make sure you keep your phone on you while you’re out and about running errands, or during your run. After that, you’ll receive the occasional notification when you’re getting close to, or have reached, your daily step/activity goal.
9. Setup Android Pay to make purchases using your smartphone

Whether you hate pulling out your wallet and swiping your credit card, or you simply want a backup method of paying for things should you leave your wallet at home, Android Pay makes it easy to make purchases using nothing but your smartphone. Like some of the other things on this list, you’ll first need to open the app and set it all up.
1.Open the Android Pay app on your phone.
2.Touch the + sign in the bottom-right corner.
3.Touch Add a credit or debit card.
4.If you already have linked cards, choose one or touch Add another card.
5.Use the camera to capture your card info or enter it manually.
The toughest part is finding a place that accepts Android Pay, but keep in mind it also works anywhere tap-to-pay or Apple Pay is accepted. Even then, not all card issuers are supported, but you can find a full list of Android Pay supported banks over here. Happy tapping!
10. Check out all the new Marshmallow features
Some of the Nexus 6P’s best features were actually introduced in Android 6.0 Marshmallow. It’s Google’s latest Android release and more than anything it polishes off some of Lollipop’s rough edges, while giving users more control of their apps, better battery life, and improved UI. We covered most of this in our “Everything New in Android Marshmallow” post from back in August, but in case you need a refresher, here’s some of the bigger things you should definitely try out:
1.Google Now on Tap – Scans entire screen to pull up relevant information in a Google Search.
2.Easy word selection and toolbar – Highlight text and a new copy/paste toolbar appears right above it.
3.Simplified volume controls – Adjust ringer/notification volume, media volume (music and videos), and alarm volume by click the drop down arrow.
4.Improved ‘Do Not Disturb’ mode – Choose between total silence (even alarms are muted), alarms only (everything but alarms are muted), and priority only (can be fine tuned to allow specific apps to still ring).
5.Greatly improved battery life while sleeping – With the new “Doze” feature, apps are frozen when the phone hasn’t been touched or moved for long periods of time, increasing standby battery life by days (yes, we said days).
6.App’s ask for permission to access device functions – Apps now ask permission before accessing things like your location, microphone, or camera. You can even fine tune this some more by manually toggling these permissions on the App Info page (Settings > Apps > select app > Permissions).
11. Explore the Nexus 6P forums

The best place for new Nexus 6P owners to mingle is on Android Forums. It’s where you’ll find all sorts of help, tips, tricks, support, suggestions, and information about your phone than shiny new smartphone. You’ll also find plenty of other users sharing their own personal experiences, favorite accessories, and whatever else pops into their head. Here are a few of the more popular threads to get you started:
Is the Nexus 6P ugly?
Is the Nexus 6P worth the no contract price? Wife says “Heck no!”
Will you buy the Nexus 6P?
Nexus 6P official ordering thread
source


